From Stream to Lake: Hands-On with Fluss Tiering into Paimon on Minio

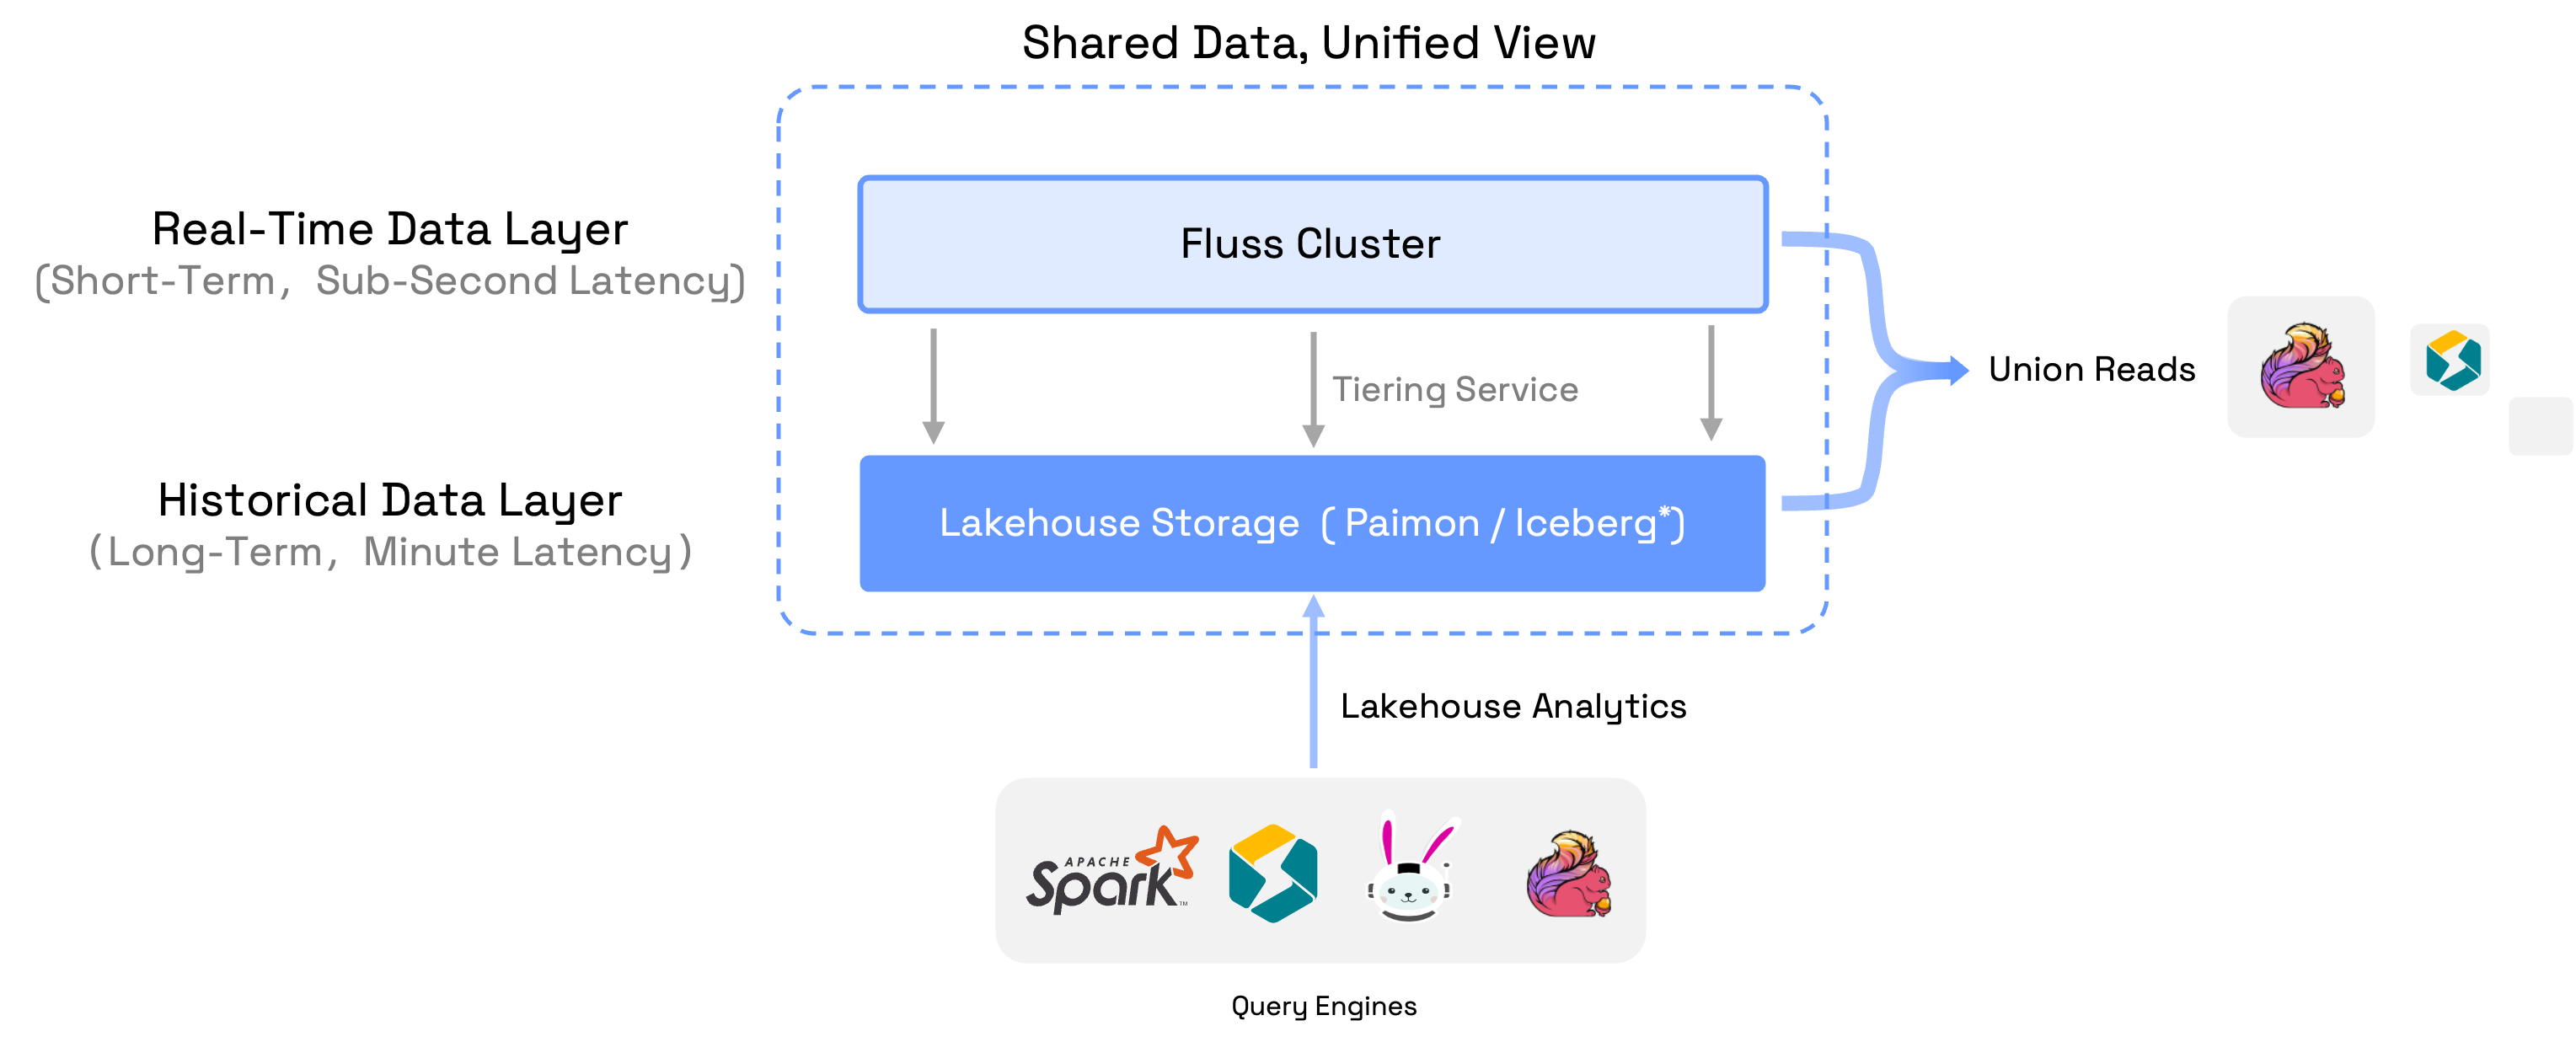
Fluss stores historical data in a lakehouse storage layer while keeping real-time data in the Fluss server. Its built-in tiering service continuously moves fresh events into the lakehouse, allowing various query engines to analyze both hot and cold data. The real magic happens with Fluss's union-read capability, which lets Flink jobs seamlessly query both the Fluss cluster and the lakehouse for truly integrated real-time processing.
In this hands-on tutorial, we'll walk you through setting up a local Fluss lakehouse environment, running some practical data operations, and getting first-hand experience with the complete Fluss lakehouse architecture. By the end, you'll have a working environment for experimenting with Fluss's powerful data processing capabilities.
Integrate with Paimon Minio Lakehouse
For this tutorial, we'll use Fluss 0.7 and Flink 1.20 to run the tiering service on a local cluster. We'll configure Paimon as our lake format on Minio as the storage backend. Let's get started:
Minio Setup
-
Install Minio object storage locally.
Check out the official guide for detailed instructions.
-
Start the Minio server
Run this command, specifying a local path to store your Minio data:
minio server /tmp/minio-data -
Verify the Minio WebUI.
When your Minio server is up and running, you'll see endpoint information and login credentials:
API: http://192.168.2.236:9000  http://127.0.0.1:9000
   RootUser: minioadmin
   RootPass: minioadmin

WebUI: http://192.168.2.236:61832 http://127.0.0.1:61832
   RootUser: minioadmin
   RootPass: minioadmin
Open the WebUI link and log in with these credentials.
-
Create a
flussbucket through the WebUI.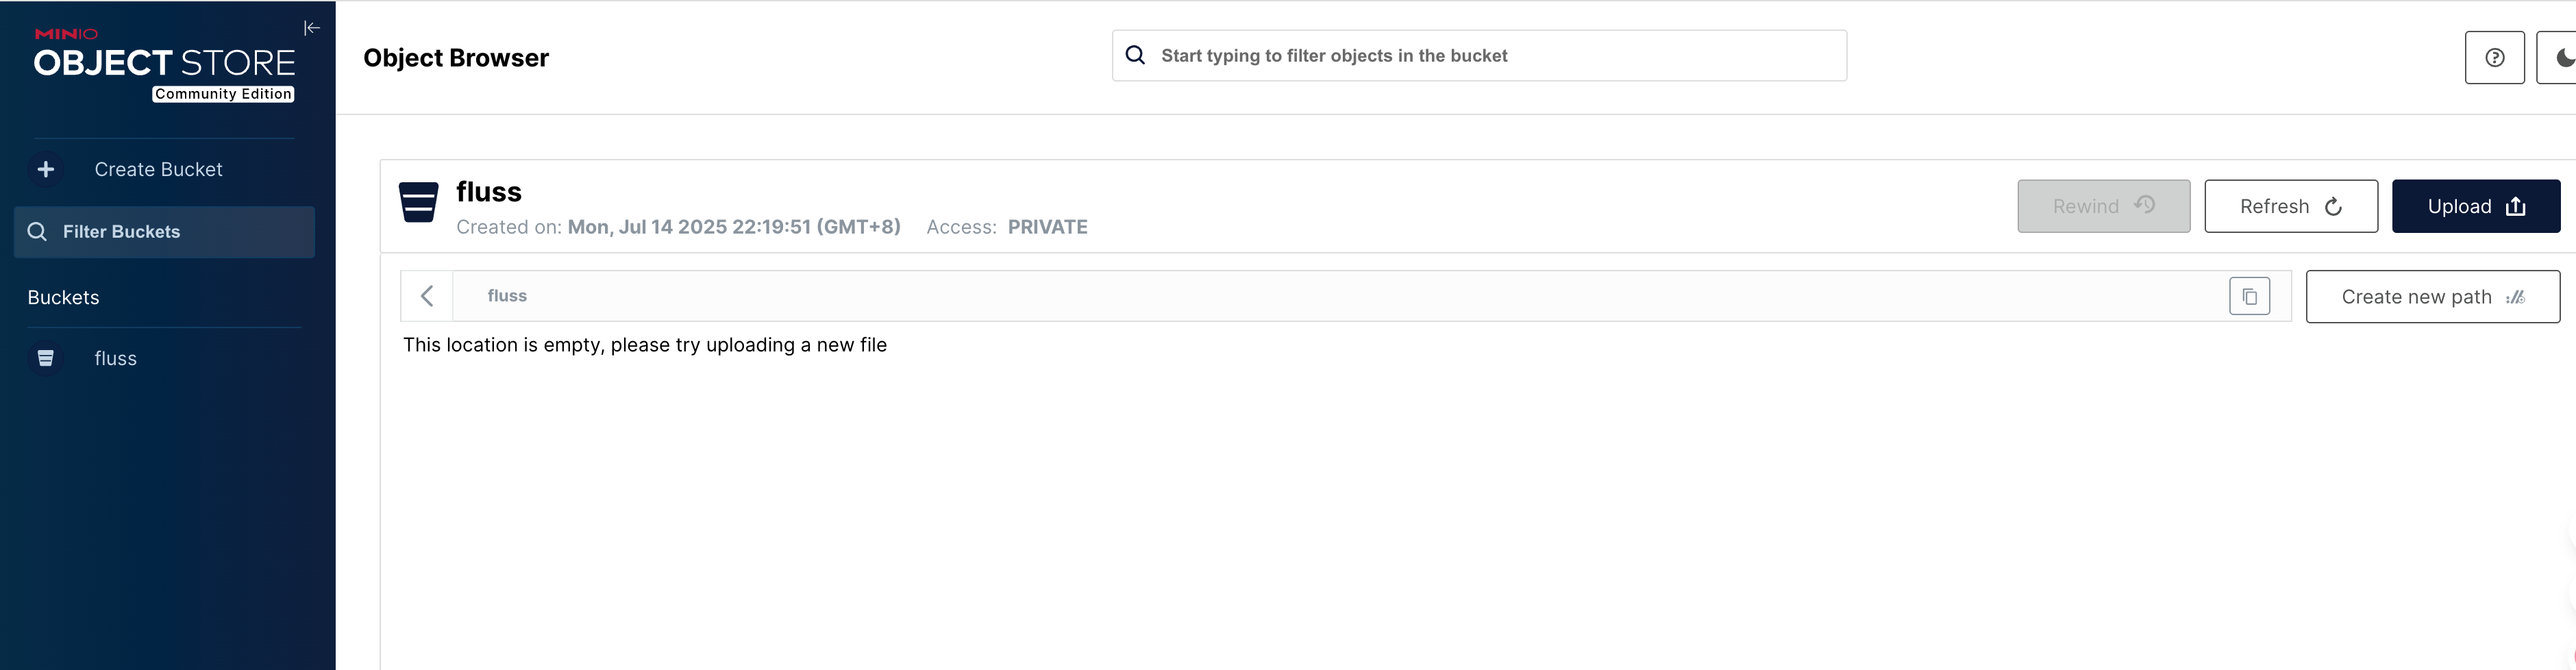
Fluss Cluster Setup
-
Download Fluss
Grab the Fluss 0.7 binary release from the Fluss official site.
-
Add Dependencies
Download the
fluss-fs-s3-0.7.0.jarfrom the Fluss official site and place it in your<FLUSS_HOME>/libdirectory.Next, download the
paimon-s3-1.0.1.jarfrom the Paimon official site and add it to<FLUSS_HOME>/plugins/paimon. -
Configure the Data Lake
Edit your
<FLUSS_HOME>/conf/server.yamlfile and add these settings:data.dir: /tmp/fluss-data
remote.data.dir: /tmp/fluss-remote-data
datalake.format: paimon
datalake.paimon.metastore: filesystem
datalake.paimon.warehouse: s3://fluss/data
datalake.paimon.s3.endpoint: http://localhost:9000
datalake.paimon.s3.access-key: minioadmin
datalake.paimon.s3.secret-key: minioadmin
datalake.paimon.s3.path.style.access: trueThis configures Paimon as the datalake format on Minio as the warehouse.
-
Start Fluss
<FLUSS_HOME>/bin/local-cluster.sh start
Flink Cluster Setup
-
Download Flink
Download the Flink 1.20 binary package from the Flink downloads page.
-
Add the Fluss Connector
Download
fluss-flink-1.20-0.7.0.jarfrom the Fluss official site and copy it to:<FLINK_HOME>/lib -
Add Paimon Dependencies
- Download
paimon-flink-1.20-1.0.1.jarandpaimon-s3-1.0.1.jarfrom the Paimon official site and place them in<FLINK_HOME>/lib. - Copy these Paimon plugin jars from Fluss into
<FLINK_HOME>/lib:
<FLINK_HOME>/lib/fluss-lake-paimon-0.7.0.jar
<FLINK_HOME>/lib/flink-shaded-hadoop-2-uber-2.8.3-10.0.jar - Download
-
Increase Task Slots
Edit
<FLINK_HOME>/conf/config.yamlto increase available task slots:numberOfTaskSlots: 5 -
Start Flink
<FLINK_HOME>/bin/start-cluster.sh -
Verify
Open your browser to
http://localhost:8081/and make sure the cluster is running.
Launching the Tiering Service
-
Get the Tiering Job Jar
Download the
fluss-flink-tiering-0.7.0.jar. -
Submit the Job
<FLINK_HOME>/bin/flink run \
    <path_to_jar>/fluss-flink-tiering-0.7.0.jar \
    --fluss.bootstrap.servers localhost:9123 \
    --datalake.format paimon \
    --datalake.paimon.metastore filesystem \
    --datalake.paimon.warehouse s3://fluss/data \
    --datalake.paimon.s3.endpoint http://localhost:9000 \
    --datalake.paimon.s3.access-key minioadmin \
    --datalake.paimon.s3.secret-key minioadmin \
--datalake.paimon.s3.path.style.access true -
Confirm Deployment
Check the Flink UI for the Fluss Lake Tiering Service job. Once it's running, your local tiering pipeline is good to go.

Data Processing
Now let's dive into some actual data processing. We'll use the Flink SQL Client to interact with our Fluss lakehouse and run both batch and streaming queries.
-
Launch the SQL Client
<FLINK_HOME>/bin/sql-client.sh -
Create the Catalog and Table
CREATE CATALOG fluss_catalog WITH (
    'type' = 'fluss',
    'bootstrap.servers' = 'localhost:9123'
);

USE CATALOG fluss_catalog;

CREATE TABLE t_user (
    `id` BIGINT,
    `name` string NOT NULL,
    `age` int,
    `birth` DATE,
    PRIMARY KEY (`id`) NOT ENFORCED
)WITH (
    'table.datalake.enabled' = 'true',
    'table.datalake.freshness' = '30s'
); -
Write Some Data
Let's insert a couple of records:
SET 'execution.runtime-mode' = 'batch';
SET 'sql-client.execution.result-mode' = 'tableau';

INSERT INTO t_user(id,name,age,birth) VALUES
(1,'Alice',18,DATE '2000-06-10'),
(2,'Bob',20,DATE '2001-06-20'); -
Union Read
Now run a simple query to retrieve data from the table. By default, Flink will automatically combine data from both the Fluss cluster and the lakehouse:
Flink SQL> select * from t_user;
+----+-------+-----+------------+
| id |  name | age |      birth |
+----+-------+-----+------------+
|  1 | Alice |  18 | 2000-06-10 |
|  2 |   Bob |  20 | 2001-06-20 |
+----+-------+-----+------------+
If you want to read data only from the lake table, simply append
$lakeafter the table name:Flink SQL> select * from t_user$lake;
+----+-------+-----+------------+----------+----------+----------------------------+
| id | name | age | birth | __bucket | __offset | __timestamp |
+----+-------+-----+------------+----------+----------+----------------------------+
| 1 | Alice | 18 | 2000-06-10 | 0 | -1 | 1970-01-01 07:59:59.999000 |
| 2 | Bob | 20 | 2001-06-20 | 0 | -1 | 1970-01-01 07:59:59.999000 |
+----+-------+-----+------------+----------+----------+----------------------------+Great! Our records have been successfully synced to the data lake by the tiering service.
Notice the three system columns in the Paimon lake table:
__bucket,__offset, and__timestamp. The__bucketcolumn shows which bucket contains this row. The__offsetand__timestampcolumns are used for streaming data processing. -
Streaming Inserts
Let's switch to streaming mode and add two more records:
Flink SQL> SET 'execution.runtime-mode' = 'streaming';

Flink SQL> INSERT INTO t_user(id,name,age,birth) VALUES
(3,'Catlin',25,DATE '2002-06-10'),
(4,'Dylan',28,DATE '2003-06-20');
Now query the lake again:
Flink SQL> select * from t_user$lake;
+----+----+--------+-----+------------+----------+----------+----------------------------+
| op | id |   name | age |      birth | __bucket | __offset |                __timestamp |
+----+----+--------+-----+------------+----------+----------+----------------------------+
| +I |  1 |  Alice |  18 | 2000-06-10 |        0 |       -1 | 1970-01-01 07:59:59.999000 |
| +I |  2 |    Bob |  20 | 2001-06-20 |        0 |       -1 | 1970-01-01 07:59:59.999000 |
| +I |  3 | Catlin |  25 | 2002-06-10 |        0 |        2 | 2025-07-19 19:03:54.150000 |
| +I |  4 |  Dylan |  28 | 2003-06-20 |        0 |        3 | 2025-07-19 19:03:54.150000 |
The first time we queried, our new records hadn't been synced to the lake table yet. After waiting a moment, they appeared.
Notice that the
__offsetand__timestampvalues for these new records are no longer the default values. They now show the actual offset and timestamp when the records were added to the table. -
Inspect the Paimon Files
Open the Minio WebUI, and you'll see the Paimon files in your bucket:
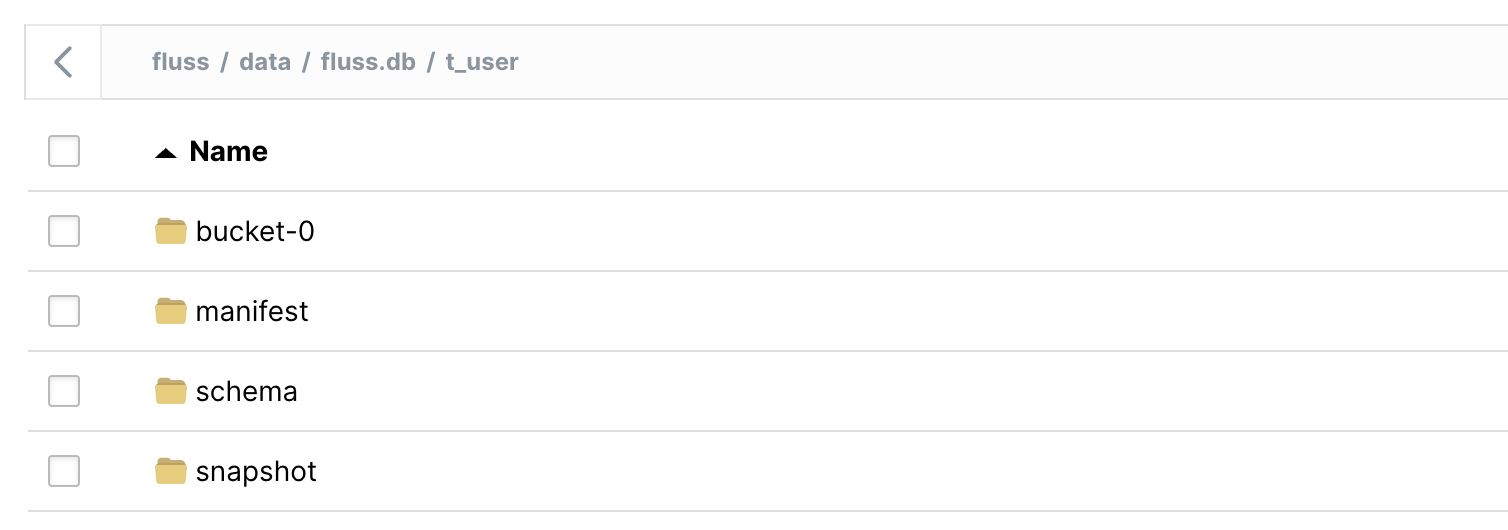
You can also check the Parquet files and manifest in your local filesystem under
/tmp/minio-data:/tmp/minio-data ❯ tree .
.
└── fluss
└── data
├── default.db__XLDIR__
│ └── xl.meta
└── fluss.db
└── t_user
├── bucket-0
│ ├── changelog-1bafcc32-f88a-42a6-bc92-d3ccf4f62d4c-0.parquet
│ │ └── xl.meta
│ ├── changelog-f1853f1c-2588-4035-8233-e4804b1d8344-0.parquet
│ │ └── xl.meta
│ ├── data-1bafcc32-f88a-42a6-bc92-d3ccf4f62d4c-1.parquet
│ │ └── xl.meta
│ └── data-f1853f1c-2588-4035-8233-e4804b1d8344-1.parquet
│ └── xl.meta
├── manifest
│ ├── manifest-d554f475-ad8f-47e0-a83b-22bce4b233d6-0
│ │ └── xl.meta
│ ├── manifest-d554f475-ad8f-47e0-a83b-22bce4b233d6-1
│ │ └── xl.meta
│ ├── manifest-e7fbe5b1-a9e4-4647-a07a-5cc71950a5be-0
│ │ └── xl.meta
│ ├── manifest-e7fbe5b1-a9e4-4647-a07a-5cc71950a5be-1
│ │ └── xl.meta
│ ├── manifest-list-8975f7d7-9fec-4ac9-bb31-12be03d297d0-0
│ │ └── xl.meta
│ ├── manifest-list-8975f7d7-9fec-4ac9-bb31-12be03d297d0-1
│ │ └── xl.meta
│ ├── manifest-list-8975f7d7-9fec-4ac9-bb31-12be03d297d0-2
│ │ └── xl.meta
│ ├── manifest-list-bba1f130-e7ab-4f5e-8ce3-928a53524136-0
│ │ └── xl.meta
│ ├── manifest-list-bba1f130-e7ab-4f5e-8ce3-928a53524136-1
│ │ └── xl.meta
│ └── manifest-list-bba1f130-e7ab-4f5e-8ce3-928a53524136-2
│ └── xl.meta
├── schema
│ └── schema-0
│ └── xl.meta
└── snapshot
├── LATEST
│ └── xl.meta
├── snapshot-1
│ └── xl.meta
└── snapshot-2
└── xl.meta
28 directories, 19 files -
View Snapshots
You can also check the snapshots from the system table by appending
$lake$snapshotsafter the Fluss table name:Flink SQL> select * from t_user$lake$snapshots;
+-------------+-----------+----------------------+-------------------------+-------------+----------+
| snapshot_id | schema_id | commit_user | commit_time | commit_kind | ... |
+-------------+-----------+----------------------+-------------------------+-------------+----------+
| 1 | 0 | __fluss_lake_tiering | 2025-07-19 19:00:41.286 | APPEND | ... |
| 2 | 0 | __fluss_lake_tiering | 2025-07-19 19:04:38.964 | APPEND | ... |
+-------------+-----------+----------------------+-------------------------+-------------+----------+
2 rows in set (0.33 seconds)
Summary
In this guide, we've explored the Fluss lakehouse architecture and set up a complete local environment with Fluss, Flink, Paimon, and Minio. We've walked through practical examples of data processing that showcase how Fluss seamlessly integrates real-time and historical data. With this setup, you now have a solid foundation for experimenting with Fluss's powerful lakehouse capabilities on your own machine.